Easy DIY Bath Bombs Without Cornstarch Recipe
There have definitely been days where my kids ask to make bath bombs, and I realize I’m out of cornstarch!
Of course it always happens right when they’re excited and ready to start. If you’ve been there, you know what I mean.
The good news is, you actually don’t need cornstarch to make a really good bath bomb! It’s simple to work around, and once I figured this out, it became one of those homemade bath bombs I keep coming back to.
We use these DIY bath bombs without cornstarch all the time now. They still fizz, they still feel fun, and they’re made with simple ingredients I already have at home!
And honestly, I like them even better this way.
If you’ve been wanting how to make a bath bomb without cornstarch, this is such an easy place to start with natural ingredients.
Why These Ingredients Work (and what they do)
Before we make them, I always like to understand why each ingredient is there. It just makes everything feel a little less intimidating, especially if you’re newer to making your own bath bombs.
Baking Soda + Citric Acid
These are the heart of any bath bomb. They’re what create that fizzing chemical reaction when the bath bomb hits the water. It’s actually just a simple reaction between an acid and a base that releases carbon dioxide, which is what causes all the bubbles.
But beyond the fizz, they’re helpful for your skin too!
Baking soda can soften the water and leave your skin feeling smooth. It’s also something I use often in detox baths.
Citric acid helps gently exfoliate and can support softer skin as well.
Epsom Salt
If you’ve ever taken an Epsom salt bath after a long day, you already know how good it feels!
This is one of my favorite ingredients to add because it helps soothe sore muscles and just makes the bath more relaxing overall. It is one I ALWAYS use in my DIY bath salts.
It also adds a little extra texture to the bath bomb, which I like as well.
Pink Kaolin Clay
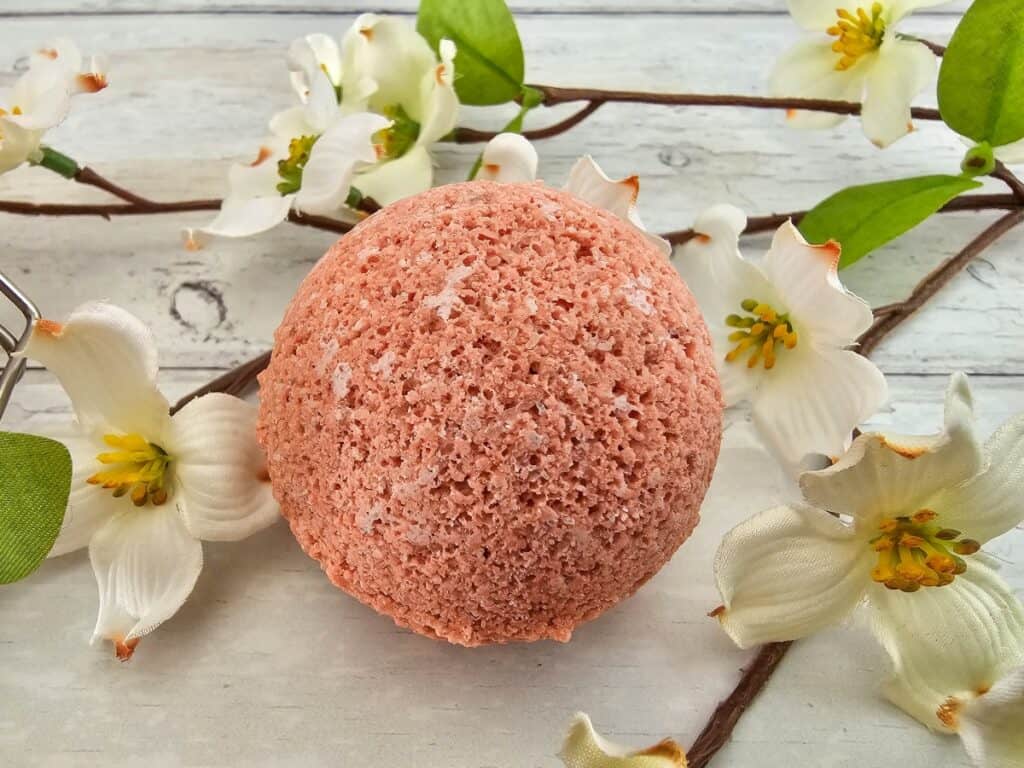
This is what gives these bath bombs that soft, natural pink color.
One of my favorite things about this recipe is that you don’t need any artificial coloring! No dyes, no mica, food coloring, nothing that’s going to leave a mess in your tub.
I’ve cleaned enough colored bath tubs to know… it’s not worth it more often than not haha.
Pink kaolin clay is also really gentle. It helps cleanse the skin and can draw out impurities, but it’s mild enough for sensitive skin or those with allergies too. Win win in my book!

Sweet Almond Oil
This is what gives your skin that soft, moisturized feeling after the bath.
It’s rich in fatty acids and helps nourish your skin while also holding the bath bomb together.
If you don’t have almond oil, don’t worry. You can use what you have. Olive oil, melted coconut oil, jojoba, avocado oil… they all work!
You don’t need anything fancy for this, just a little bit for moisture. I personally love to make a lavender infused oil for my bath bombs.
Essential Oils (Optional)
This is where you can really customize your bath with all the different scents you want.
If I’m sore, I usually reach for eucalyptus, peppermint, or a muscle blend.
If I just want to relax at the end of the day, lavender is always my go-to. It’s simple and calming, and it works every time.
If you are making these beautiful bath bombs for your kids, you will want to use kid-safe essential oils. Lavender works best, or simply not add it in at all!
I personally stay away from fragrance oils. They can be irritating and they’re just not something I want soaking into my skin.
Pin This Post For Later:

Some of these links are affiliate links meaning if you purchase from these links, I will earn a commission at no extra cost to you. Everything I share is my own opinions and things I personally use and love. You can learn more by reviewing my disclosure. As an Amazon affiliate, I earn from qualifying purchases.
No Cornstarch Bath Bomb Recipe
This recipe makes about 3 small and 2 medium bath bombs!
Ingredients
- ½ cup baking soda
- ¼ cup citric acid
- ¼ cup Epsom salt
- 3 tablespoons Pink Kaolin Clay
- 1 tablespoon sweet almond oil
- ½ tablespoon water
- Bath bomb molds

Directions
Add the baking soda, citric acid, Epsom salt, and kaolin clay to a large bowl, and stir with a whisk until all of the dry ingredients are completely combined.

Mix the sweet almond oil and water together. The wet ingredients mix easily if you shake it in a small glass jar.
Slowly pour a tiny bit of liquid into the mixture while whisking.
You want to do this drop by drop so you don’t make the bath bombs fizz, otherwise you may ruin the mixture. Whisk together until you have a mixture that easily clumps together like wet sand.

Overfill two halves of the bath bombs mold, press together, and give a quick twist.

Allow the mixture to set in the mold for 1 hour, then you can unmold and allow to set overnight to completely harden.

Notes
- You can use any carrier oil you prefer. Jojoba, hemp seed, avocado, are all great options.
- Kaolin clay is my favorite for this, but you can experiment with others!
- Metal molds tend to hold their shape better than silicone for bath bombs.
A Quick Note on Safety
Everything in this recipe is gentle and simple, but if you’re making these for little ones or sensitive skin, I’d start without essential oils or use very small amounts.
And always test new ingredients if you’re unsure how your skin will react!
Troubleshooting Tips
Even with simple ingredients, sometimes bath bombs can be a little tricky. Here are some quick fixes if things don’t go exactly as planned:
My bath bombs fizzed too early while mixing!
This usually means the liquid was added too quickly or the mixture got too wet. Try adding the liquid a few drops at a time and whisk gently. If it starts fizzing early, you can quickly press the mixture firmly into molds to save it.
The bath bombs are crumbly and fall apart.
If your mixture feels too dry, add just a tiny bit more liquid, water or oil, until it holds together like damp sand when squeezed. But be careful not to add too much at once!
They’re not fizzing much in the bath.
Make sure your baking soda and citric acid are fresh, these ingredients lose their fizz power over time. Also, avoid storing bath bombs in humid places, which can start the fizz reaction prematurely.
Bath bombs are sticky or won’t dry properly.
Humidity is the enemy here! Let your bath bombs dry in a cool, dry spot for at least 24 hours. If it’s humid, consider popping them in front of a fan or air conditioner to help.

Pink Kaolin Clay Bath Bomb Recipe
Materials
- ½ cup baking soda
- ¼ cup citric acid
- ¼ cup Epsom salt
- 3 tablespoons Pink Kaolin Clay
- 1 tablespoon sweet almond oil
- ½ tablespoon water
- Bath bomb molds
Instructions
- Add the baking soda, citric acid, Epsom salt, and kaolin clay to a large bowl, and stir with a whisk until all of the dry ingredients are completely combined.
- Mix the sweet almond oil and water together. The wet ingredients mix easily if you shake it in a small glass jar.
- Slowly pour a tiny bit of liquid into the mixture while whisking.
- You want to do this drop by drop so you don't make the bath bombs fizz, otherwise you may ruin the mixture. Whisk together until you have a mixture that easily clumps together like wet sand.
- Overfill two halves of the bath bombs mold, press together, and give a quick twist.
- Allow the mixture to set in the mold for 1 hour, then you can unmold and allow to set overnight to completely harden.
Notes
- You can use any carrier oil you prefer. Jojoba, hemp seed, avocado, are all great options.
- If you are using essential oils, add in with the wet ingredients.
- Any clay should work, but I only used Kaolin clay for this recipe. You would have to try it out just to double check!
- Many like to use silicone molds, but I prefer metal molds for bath bombs. The silicone molds are great for soaps, but they do make it harder to keep the shape of the bath bomb.
Final Thoughts
I used to think bath bombs had to be complicated or full of extra ingredients to work well.
But this recipe really reminded me that simple is often better!
You don’t need cornstarch. You don’t need artificial colors. You don’t need anything complicated.
Just a few good ingredients and a little patience.
If you’re new to making your own bath products, this is a great place to start! And if your kids are anything like mine, they’ll just be excited to watch them fizz.
Let me know if you try it out!


